DbSchema | Cassandra - How to Create a Materialized View?
Table of Contents
- Introduction
- Prerequisites
- What is a Materialized View?
- Advantages and Limitations of Materialized Views
- Restrictions on Using Materialized Views
- Creating a Materialized View in cqlsh and DbSchema
- Conclusion
- References
Introduction
Cassandra is a highly scalable and distributed NoSQL database that excels in handling large volumes of data with high availability and fault tolerance. One of the powerful features of Cassandra is the ability to create materialized views, which provide a denormalized representation of data for optimized query performance. In this article, we will explore how to create a materialized view in __cqlsh (Cassandra Query Language Shell) and __DbSchema, along with their advantages, limitations, and usage restrictions.
Prerequisites
Before proceeding, make sure you have the following prerequisites:
- __Apache Cassandra` installed and running. You can find the installation guide here.
- Basic understanding of __Cassandra Query Language` (CQL), keyspaces, and column families.
- Familiarity with command-line tools and SQL-like query languages.
What is a Materialized View?
A __materialized view` in Cassandra is a precomputed table that stores the results of a query, typically derived from a base table, in a denormalized format. It allows for efficient retrieval of data by eliminating the need to perform complex joins and aggregations on the fly. Materialized views are updated automatically as data in the base table changes, ensuring real-time synchronization between the base table and the materialized view.
Advantages and Limitations of Materialized Views
__Advantages`:
Materialized views offer several advantages when it comes to query performance optimization in Cassandra:
Improved Read Performance: Materialized views allow for faster read operations by precomputing and storing the results of complex queries. This eliminates the need to perform expensive operations like joins and aggregations at query time.
Flexible Denormalization: Materialized views provide flexibility in denormalizing data to suit specific query patterns. They enable the creation of alternative data representations tailored for different use cases, optimizing query performance for specific queries without impacting the original data model.
Reduced Network Overhead: By storing denormalized data in materialized views, the need to fetch data from multiple tables across the network is minimized. This reduces network overhead and improves query latency.
__Limitations`:
However, materialized views also come with certain limitations:
Storage Overhead: Materialized views consume additional storage space as they duplicate data from the base table. The amount of storage required depends on the size and complexity of the queries used to populate the materialized view.
Write Performance Impact: As materialized views are automatically updated upon changes to the base table, write operations may experience increased latency compared to when using only the base table.
Restrictions on Using Materialized Views
While materialized views provide powerful query optimization capabilities, there are some restrictions to consider:
Limited Query Support: Materialized views support a subset of query operations compared to the base table. Not all types of queries are suitable for materialized views, especially those involving complex aggregations or non-deterministic functions.
Immutable Primary Key: The primary key of the base table used to create a materialized view must be immutable. This ensures that the materialized view remains consistent with the base table as changes occur.
Column Selection: The column list specified when creating a materialized view determines the columns available for querying. Columns not included in the materialized view cannot be directly accessed.
Creating a Materialized View in cqlsh and DbSchema
In cqlsh:
- Step 1: Launch cqlsh Open your terminal or command prompt and enter the following command to launch cqlsh:
cqlsh
- Step 2: Connect to the desired keyspace Use the following command to connect to the keyspace where you want to create the materialized view:
USE keyspace_name;
Replace __keyspace_name` with the name of your desired keyspace.
To create a keyspace refer to Cassandra-How to create a keyspace?
Step 3: Create the base table If you haven’t already created the base table, you need to define it before creating a materialized view. The materialized view will be based on this table.To create a table refer to Cassandra-How to create a table?
Step 4: Create the materialized view To create a materialized view, use the __CREATE MATERIALIZED VIEW` statement. Here’s the syntax:
CREATE MATERIALIZED VIEW view_name AS
SELECT column1, column2, ...
FROM base_table_name
WHERE condition
PRIMARY KEY (primary_key_columns);
Replace __view_name with the desired name for your materialized view, __column1, column2, ... with the columns you want to include in the view, __base_table_name with the name of the base table, __condition with any filtering condition (optional), and __primary_key_columns` with the primary key columns of the materialized view.
Step 5: __Customize` the materialized view You can further customize the materialized view by adding secondary indexes, defining clustering columns, or specifying additional options such as WITH CLUSTERING ORDER. Modify the materialized view definition as per your requirements.
Step 6: __Execute` the CREATE MATERIALIZED VIEW statement Once you have defined the materialized view, execute the statement to create it. Enter the following command in cqlsh:
CREATE MATERIALIZED VIEW view_name AS ...
Replace __view_name` with the actual name of your materialized view.
- Step 7: __Verify
the materialized view creation To confirm that the materialized view was created successfully, you can use the __DESCRIBEcommand. Run the following command:
DESCRIBE MATERIALIZED VIEW view_name;
Replace __view_name` with the name of your materialized view.
That's it! You have now created a materialized view in cqlsh. Remember to update the materialized view whenever changes are made to the base table to ensure the view remains consistent.
Components of CREATE MATERIALIZED VIEW Clause
Here’s a breakdown of the components of the __CREATE MATERIALIZED VIEW` clause:
| Component | Description |
|---|---|
| __IF NOT EXISTS` | Optional clause that ensures the materialized view is created only if it does not already exist. |
| __keyspace_name.view_name` | Specifies the keyspace and name for the materialized view. |
| __column_list` | Defines the columns to include in the materialized view. These columns should be selected from the base table. |
| __base_table_name` | The name of the base table from which the materialized view is derived. |
| __PK_column_name IS NOT NULL` | Specifies the primary key column of the base table, ensuring immutability. |
| __AND relation` | Optional clause that allows filtering of data using specific conditions. |
| __WITH column_list` | Optional clause that specifies additional columns to include in the materialized view.These columns are derived from the base table. |
In DbSchema:
To create a materialized view in DbSchema, follow the steps outlined below:
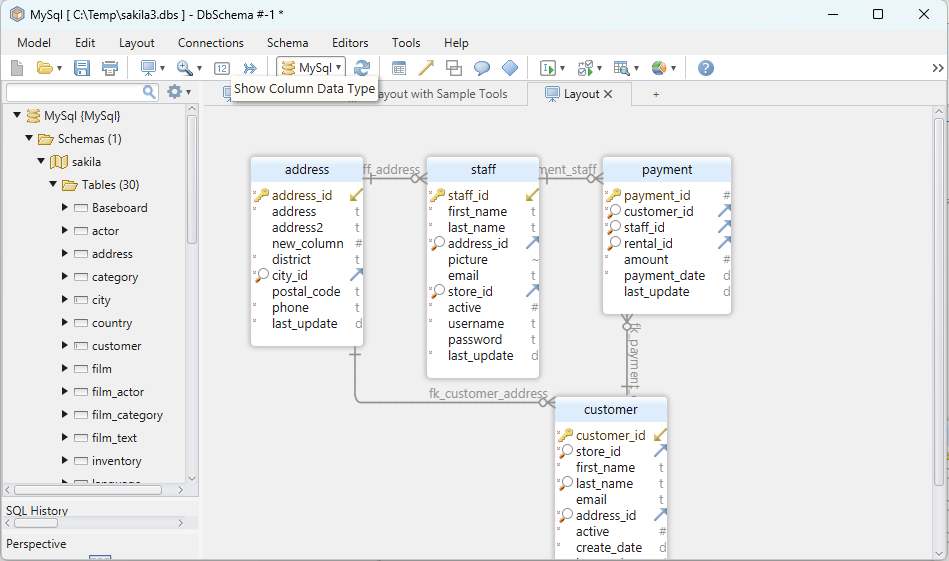
Open DbSchema: Launch DbSchema, the visual database design and management tool.
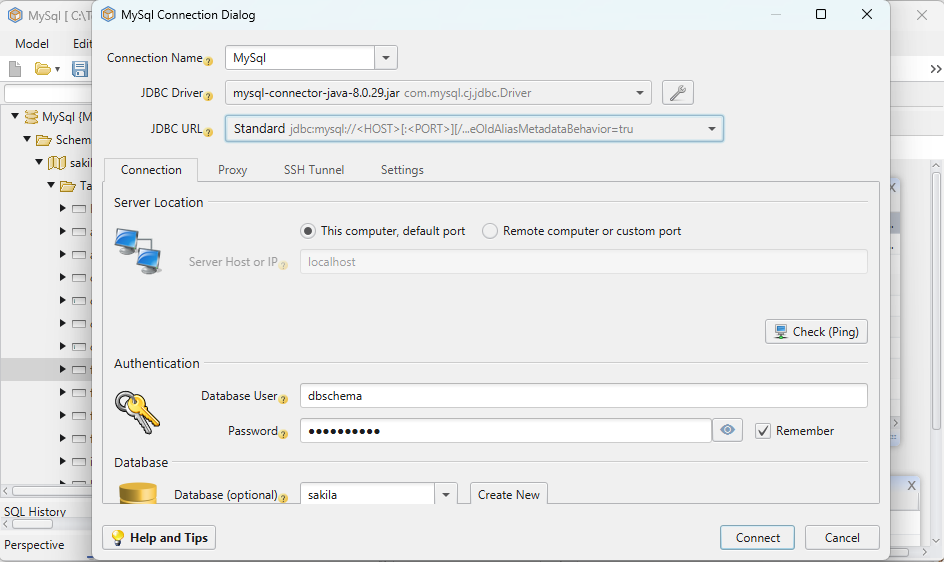
Connect to Cassandra: Connect to your Cassandra database by selecting the “Cassandra” option from the connection wizard and providing the necessary connection details such as host, port, username, and password. Click on the “Connect” button to establish the connection.
Select the Keyspace: Once connected to your Cassandra database, expand the tree view in the left-hand panel to locate and select the desired keyspace where you want to create the materialized view.
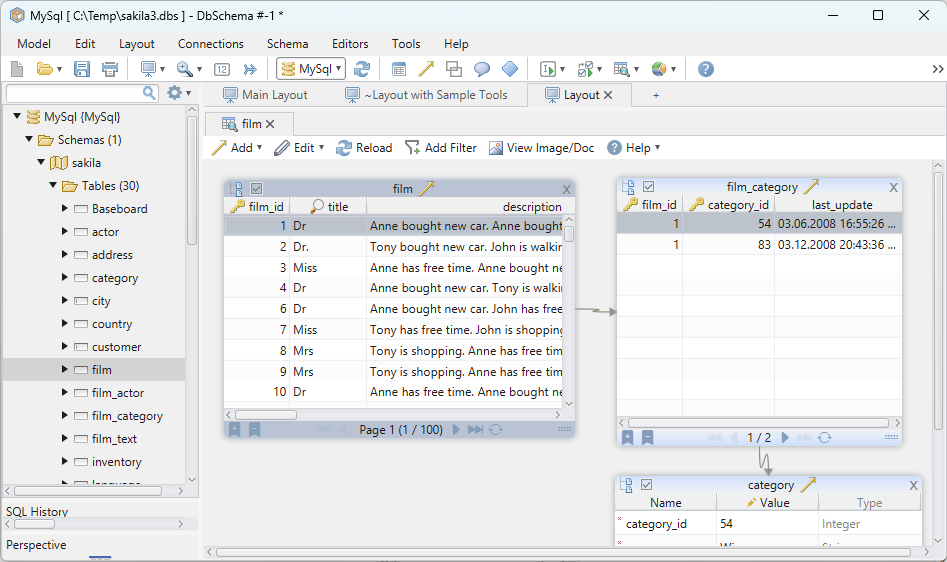
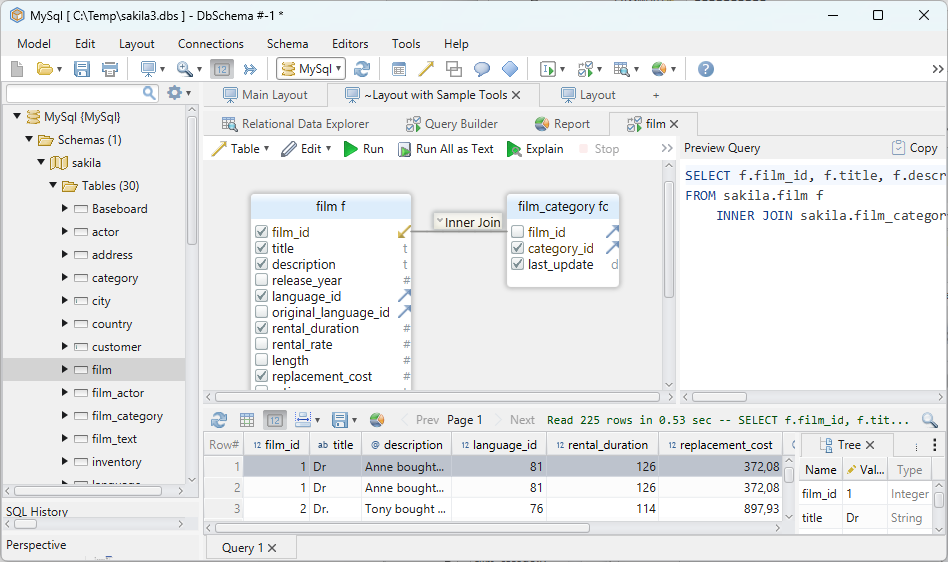
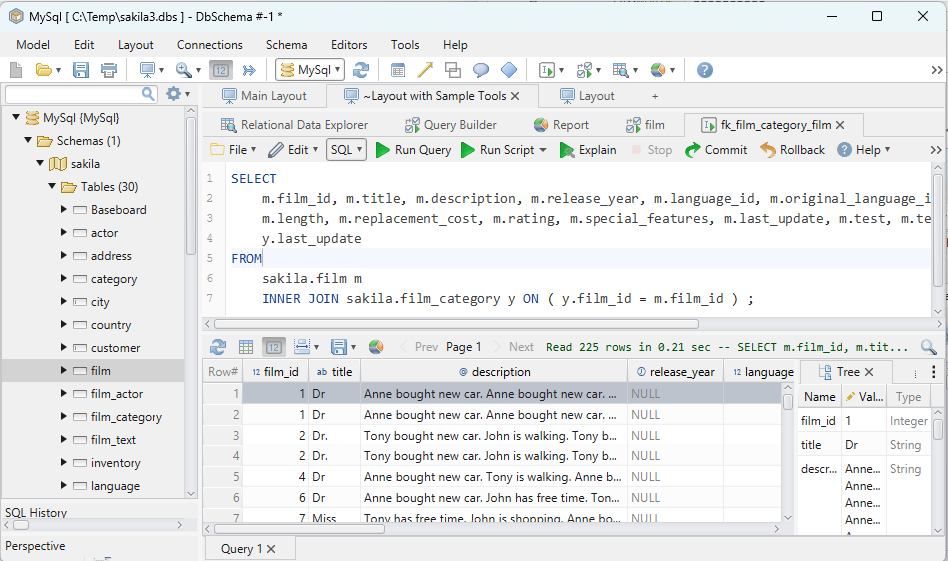
Open Query Builder: Right-click on the keyspace and choose “Query Builder” from the context menu. This will open the Query Builder tool, which allows you to visually construct queries and create materialized views.
Build the Query: In the Query Builder, construct the query that defines the materialized view by selecting the columns you want to include from the base table. You can drag and drop tables and columns from the tree view onto the query canvas to build the query visually.
Map Columns to the Materialized View: Once the query is built, map the columns from the base table to the materialized view. DbSchema provides a visual mapping interface where you can specify the target column in the materialized view for each selected column in the query.
Generate CQL Statement: After mapping the columns, DbSchema will generate the CQL statement for creating the materialized view based on the query and column mappings. Review the generated CQL statement to ensure it reflects your desired configuration.
Execute the CQL Statement: Click on the “Execute” button to execute the generated CQL statement and create the materialized view in your Cassandra database.
Verify Materialized View Creation: After executing the CQL statement, DbSchema will display the execution status. Verify that the materialized view has been successfully created by checking the database schema or refreshing the tree view in DbSchema to see the newly created materialized view under the respective keyspace.
By following these steps, you can create a materialized view in DbSchema for your Cassandra database. DbSchema’s visual query builder simplifies the process by providing a graphical interface for constructing queries and mapping columns, while automatically generating the corresponding CQL statement for materialized view creation.
Create Materialized View and Visually Manage Cassandra using DbSchema
DbSchema is a Cassandra client and visual designer. DbSchema has a free Community Edition, which can be downloaded here.
Create Materialized View
- Start the application and connect to the Cassandra database.
- Select keyspace and open query builder to build the query.
- Map columns to materialized view and execute CQL statements.
Conclusion
Materialized views in Cassandra provide a powerful mechanism for optimizing query performance by precomputing and storing denormalized data. They offer improved read performance, flexible denormalization options, and reduced network overhead. However, materialized views also come with limitations, including storage overhead and potential impacts on write performance. Understanding these advantages, limitations, and restrictions is crucial when leveraging materialized views to enhance the performance of your Cassandra database.