Databases & Connectivity
DbSchema supports connections to various SQL and some NoSQL databases. A proper JDBC Driver is required for this connection. When you connect to a database, DbSchema automatically retrieves the necessary JDBC driver from its public web repository.
To learn how to configure the connection dialog, click here. If your database is hosted on a different computer, you will need to provide the correct TCP/IP HostName. For certain databases, you may also need to enable remote connections, activate TCP/IP, grant user access, or configure firewall settings. More details can be found in the next section.
If the database you're looking for is missing from the JDBC driver list you can upload the driver in DbSchema.

Database Specific Information
Learn how to connect to one of this databases by clicking one of the links below.See all supported databases here.
Table of Contents
Connection Dialog
The connection dialog allows you to configure connections to any database with ease.
Establish a Connection Using a Composed URL
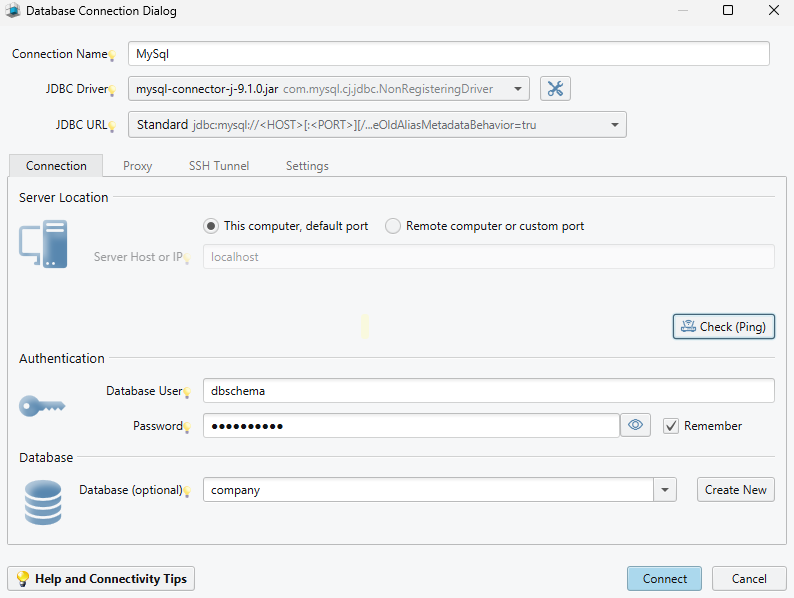
- Assign a Connection Name for your database connection. This name will serve as an alias for referencing the connection throughout the application.
-
Select the appropriate JDBC Driver, a .jar file required for database connectivity. DbSchema automatically downloads the driver when you choose your DBMS.
JDBC drivers are typically provided by the database vendor. If needed, you can upload a custom driver by clicking the Cogs icon. Uploaded drivers are stored locally at
C:\Users\<YourUser>\.DbSchema\drivers\SqlServer.... -
Configure the JDBC URL template. You can either use a pre-built template or manually edit the URL.
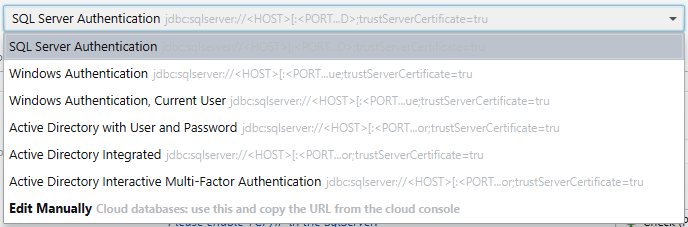
The JDBC URL is a formatted string containing key connection details such as host, port, and database name.DbSchema automatically builds the JDBC URL using the values you provide for host, port, and database fields.
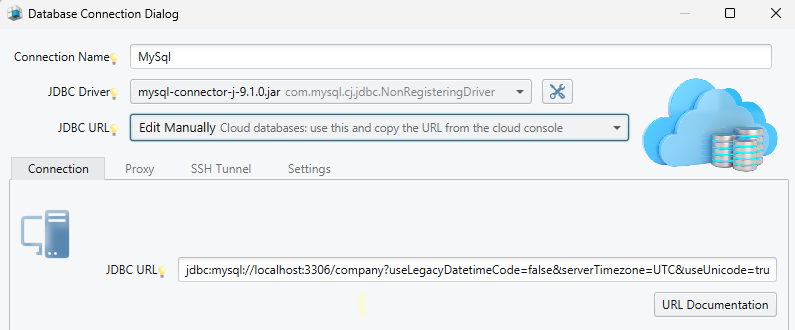
For cloud databases (e.g., AWS, Azure, Google Cloud), choose Edit Manually and copy the URL from the cloud console. A text field will appear for entering the JDBC URL.
-
In the Server Location section, specify the database server's location:
- Select This computer, default port for a locally hosted database.
- Select Remote computer or custom port for a remote database, and provide the server's hostname and port.
- Use the Check (Ping) button to test the server connection and verify proper configuration.
- In the Authentication section, enter the Database User and Password. These credentials are typically defined during database setup or user creation. Click Help and Tips for additional guidance on database connection settings.
- In the Database section, specify a name for your DbSchema model. This local file allows you to work offline on your schema and synchronize changes with the database later.
How to Connect to a Remote Server or Custom Port
To establish a connection with a remote server, you need to specify the server's host and port details.
Hostname vs. IP Address: A hostname is effective if your network has a configured DNS server, which translates IP addresses into readable computer names.
If no DNS server is available, you must use the server's IP address directly.
How to find the Host Name
Windows
You can find the TCP/IP hostname of a Windows server using several methods. Here are a couple of straightforward ways:
Using Command Prompt
- Open Command Prompt: Press Win + R, type cmd, and press Enter.
- Type the following command: hostname This will display the hostname of the server.
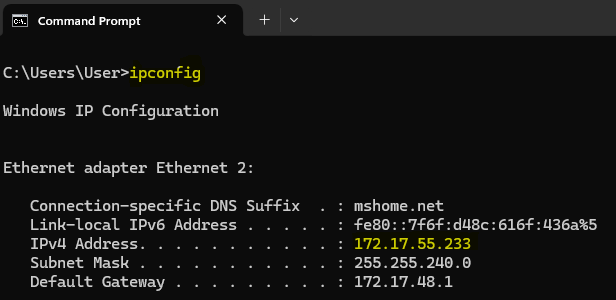
Using ipconfig
- Open Command Prompt: Press Win + R, type cmd, and press Enter.
- Type the following command: ipconfig /all
- Look for the “Host Name” in the output. This will show the hostname along with other network configuration details.
Using nslookup
- Open Command Prompt: Press Win + R, type cmd, and press Enter.
- Type the following command: nslookup <IP address>
- Replace
with the actual IP address of the server. This will return the hostname if a reverse DNS entry exists1.
Using nbtstat
- Open Command Prompt: Press Win + R, type cmd, and press Enter.
- Type the following command: nbtstat -A <IP address>
- Replace <IP address> with the actual IP address of the server. This will display the NetBIOS name table, including the hostname2.
Linux
- Open command-line terminal app Application > Accessories > Terminal;
- Type hostname or hostname1 or cat /proc/sys/kernel/hostname;
- Press [Enter];
- The hostname of your machine will appear on the next line.
Mac
- Go to Apple Menu > System Preferences > Sharing;
- The name of your Mac will appear on the screen.
How to find the IP Address
On Windows
- Type cmd in the Start Menu;
- Type ipconfig command in Command Prompt;
- Look for the IPv4 Address.
Linux
- Open command-line terminal app Application > Accessories > Terminal;
- Type ifconfig -a or hostname -l;
- Press [Enter];
- The ip of your machine will appear on the screen.
Mac
- Go to Apple Menu > System Preferences > Network
- On the left, the option that has a green dot is the network that you are connected to;
- In the smaller text underneath the status, you should find your IP Address.
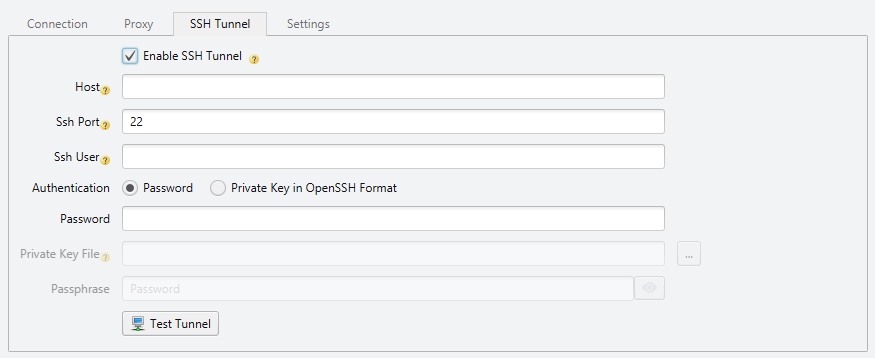
Establish an SSH Connection
Establish an SSH Tunnel to encrypt the communication to the database.
- Enter the Host where the SSH Server is activated;
- Enter the SSH Port where the server is activated. The default port is 22;
- Enter the SSH User configured in the SSH Tunnel;
- Select the Authentication method. This can be a password or an encrypted private key in Open SSH format.
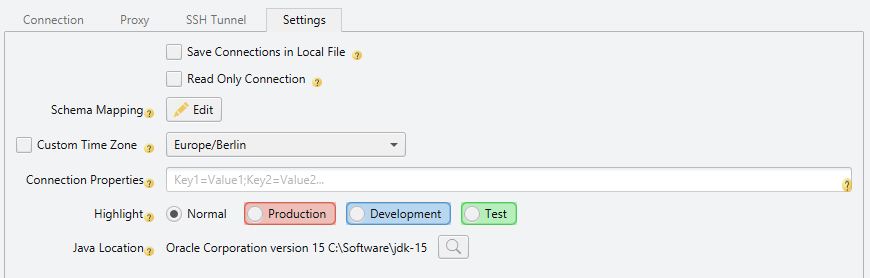
More options
In the Options section you can modify details about your model.
- Save your model to a local file. By default, DbSchema saves all models to model files. Enabling this feature will allow you to save the connection data separately, to a local file.
- Read-Only Connection won't allow any modifications in the database. You can add exceptions to this rule.
- Set a specific timezone for DbSchema so you can avoid timezone errors when your computer and the database use different timezones.
- Highlight Connection Combo allows you to give different colors for different types of connections (eg. Production, Testing, Development).
- You can set a different Alias for the schema on your computer.
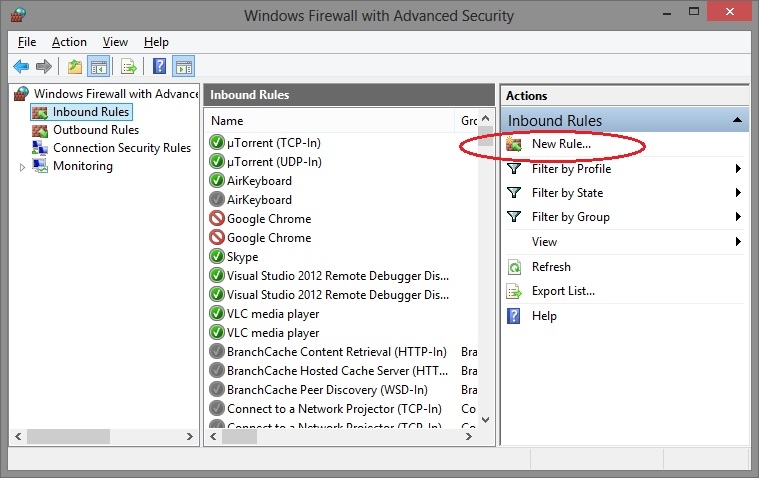
Enable Windows Firewall
Windows Firewall is blocking connectivity from other machines. To allow connectivity you have to create a new Inbound rule for the database port. Go to Control Panel > System and Security > Windows Defender Firewall > Advanced Settings > Inbound Rules and follow the “New Rule” wizard.