DbSchema | How to Create Triggers in SQLite?

Table of Contents
- Introduction
- Prerequisites
- What is a Trigger?
- Advantages and Limitations of Using a Trigger
- Restrictions on Using a Trigger
- Creating a Trigger in SQLite3
- Creating a Trigger in DbSchema
- Conclusion
- References
Introduction
In the world of databases, __triggers play a __pivotal role. Triggers are database operations that are automatically performed when a specified database event occurs. In this article, we will __delve into how to create a trigger in __SQLite3 and __DbSchema`, two popular platforms for database management.
Prerequisites
Before you can start creating triggers in SQLite3 and DbSchema, you’ll need the following:
- __SQLite3` installed on your local machine.
- __DbSchema` installed on your local machine.
- Basic understanding of __SQL` and database concepts.
For installation and establishing connection you can read our article SQLite-How to create a database?
What is a Trigger?
A __trigger is a stored procedure in a database that automatically reacts to an event such as __INSERT, UPDATE, or DELETE. When these events occur in a specified table, the database automatically executes the trigger’s defined code. The trigger can be __activated` either before or after the event.
Type of Trigger:
Following table shows the type of trigger:
| Trigger Type | Description |
|---|---|
| __BEFORE INSERT` | This trigger is fired before the new record is inserted into the table. You might use this trigger to validate or modify data before it’s stored in the database. |
| __AFTER INSERT` | This trigger is fired after the new record has been inserted into the table. You might use this trigger to take some action based on the new data, such as logging changes or updating another table. |
| __BEFORE UPDATE` | This trigger is fired before an existing record is updated in the table. You might use this trigger to validate or modify the new data before the update operation is carried out. |
| __AFTER UPDATE` | This trigger is fired after an existing record has been updated in the table. You might use this trigger to take some action based on the changed data, such as logging changes or updating another table. |
| __BEFORE DELETE` | This trigger is fired before a record is deleted from the table. You might use this trigger to take some action before the data is removed, such as archiving the data. |
| __AFTER DELETE` | This trigger is fired after a record has been deleted from the table. You might use this trigger to take some action based on the deletion, such as logging the change or updating another table. |
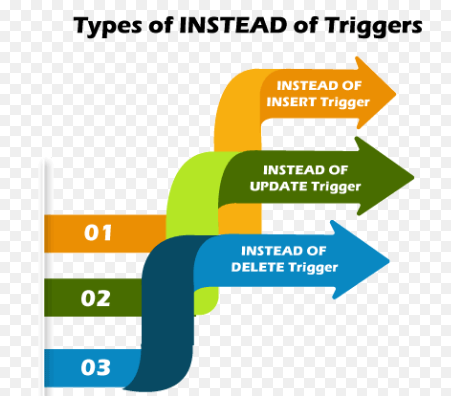
| __INSTEAD OF INSERT` | This trigger is fired instead of the insert operation. This type of trigger is typically used in views, where the insert operation might not map directly to a single table. The trigger contains the logic to perform the intended operation. |
| __INSTEAD OF DELETE` | This trigger is fired instead of the delete operation. Like the “INSTEAD OF INSERT” trigger, this type of trigger is typically used in views where the delete operation might not map directly to a single table. The trigger contains the logic to perform the intended operation. |
| __INSTEAD OF UPDATE` | This trigger is fired instead of the update operation. Like the other “INSTEAD OF” triggers, this type of trigger is typically used in views where the update operation might not map directly to a single table. The trigger contains the logic to perform the intended operation. |
Advantages and Limitations of Using a Trigger
Advantages
- Data Integrity: Triggers __enforce
business rules and aid in maintaining complex __integrity constraintsthat are beyond the capacity of regular integrity checking built into the relational database management system. - Event-Driven Actions: Triggers execute __automatically
upon events, making them suitable for __auditingor enforcing complex business rules. - Record Keeping: Triggers can keep a detailed history of changes in the database, which aids in __database recovery
and __audit trails.
Limitations
- Performance: Triggers can __slow down` data modification operations since they execute additional operations.
- Complexity: Triggers can make application logic more __complex
and harder to __debug. - Unexpected Results: Since triggers are automatically executed, they can lead to __unexpected side effects` if not carefully managed.
Restrictions on Using a Trigger
There are several restrictions on using triggers in SQLite:
- Triggers are not allowed on __views`.
- You cannot use the __TEMP` keyword while creating triggers.
- SQLite does not support the __SQL
standard __INSTEAD OFstatement in triggers.
Creating a Trigger in SQLite3
Step 1: Start SQLite Interactive Shell
Open your terminal (Command Prompt on Windows, Terminal app on macOS or Linux) and type the following command to start the __SQLite` interactive shell.
sqlite3
This will open the SQLite __command line interface`.
Step 2: Create a Database (If not exists)
If you don’t have a database to work on, you can create a new one. Use the following command to create a new database named __SchoolDB`.
sqlite3 SchoolDB.db
To know more about creating a database you can read our article SQLite-How to create a database?
Step 3: Create a Table (If not exists)
We’ll need a table to create a trigger on. If you don’t already have a table, you can create one using the __CREATE TABLE command. Let's create a table named __students.
CREATE TABLE students(
   student_id INTEGER PRIMARY KEY,
   student_name TEXT NOT NULL,
   grade TEXT NOT NULL
);
To know more about creating a table you can read our article SQLite-How to create a Table?
Step 4: Creating the Trigger
You can create a trigger using the __CREATE TRIGGER` statement. The general syntax is:
CREATE TRIGGER trigger_name [BEFORE | AFTER | INSTEAD OF] [INSERT | UPDATE | DELETE]
ON table_name
BEGIN
-- Trigger logic goes here
END;
We want to create a trigger named __delete_low_grade_students that will automatically delete any student with a grade below __C after an __INSERT` operation.
CREATE TRIGGER delete_low_grade_students
AFTER INSERT
ON students
BEGIN
   DELETE FROM students WHERE grade < 'C';
END;
Step 5: Testing the Trigger
Before executing our trigger, let’s suppose we have the following data in our __students` table:
| _student_id_ | student_name | grade |
|---|---|---|
| __1` | Alice | A |
| __2` | Bob | B |
| __3` | Charlie | C |
To test the trigger, let’s insert a new student with a grade below __C - let's say __D:
INSERT INTO students(student_name, grade) VALUES ('John Doe', 'D');
After this operation, our __students` table should look like this:
| student_id | student_name | grade |
|---|---|---|
| __1` | Alice | A |
| __2` | Bob | B |
| __3` | Charlie | C |
4 |
John Doe | D |
But because of our trigger, the record for John Doe should be automatically deleted.
Let’s verify by querying the students table:
SELECT * FROM students;
Now, our students table should look like this:
| student_id | student_name | grade |
|---|---|---|
1 |
Alice | A |
2 |
Bob | B |
3 |
Charlie | C |
As you can see, John Doe is not in the table, confirming that our trigger is working correctly.
And that's it! You have successfully created and tested a trigger in SQLite3. It’s crucial to understand how to use triggers properly since they are a powerful tool that can help you maintain the integrity of your data in a database. However, be cautious when using them because they can cause performance issues if not properly managed.
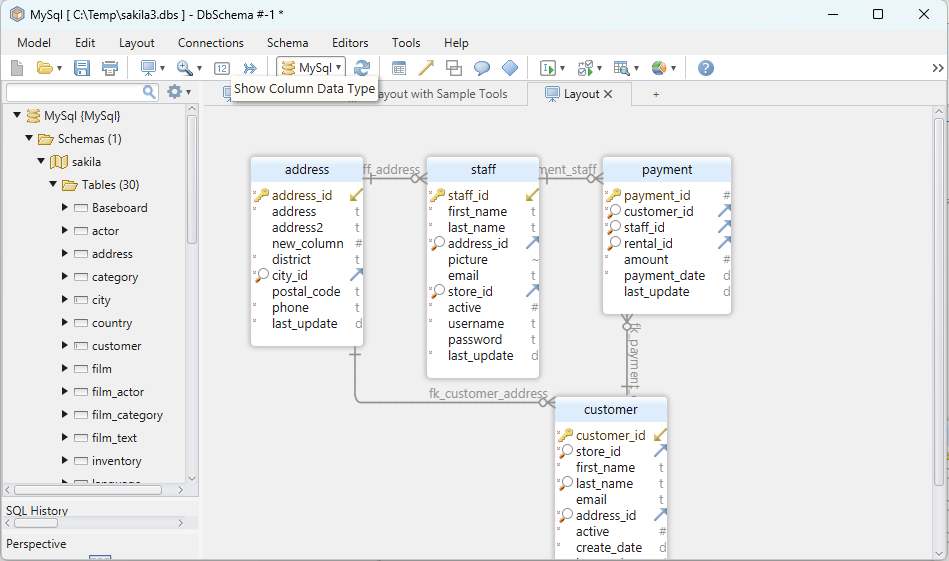
Creating a Trigger in DbSchema
In DbSchema, you can create triggers using the visual interface.
Openthe DbSchema application.Connectto your database.- Open the schema of your database. If the database is not listed, you can add it.
- Right-click on the table for which you want to create a
trigger. - Select
Create Trigger. - A dialog box will open where you can write your SQL code for the trigger.
- After writing the trigger, click
Apply. - The trigger is now created and will execute based on the conditions specified.
Note: The SQL syntax for creating triggers in DbSchema follows the same format as that of SQLite3, as DbSchema is a universal tool for managing databases.
Visually Manage SQLite using DbSchema
DbSchema is a SQLite client and visual designer. DbSchema has a free Community Edition, which can be downloaded here.
Key Features of DbSchema:
Following are the key features of DbSchema which distinguish it from other database GUI tools.
Conclusion
In this article, we have explored triggers in SQLite3 and DbSchema, their advantages, limitations, and restrictions. We have also provided a step-by-step guide to creating triggers in both platforms. Triggers are a powerful tool in managing database events and maintaining data integrity. However, they must be used judiciously due to their potential complexity and performance implications.